

How To Spray Paint Camo On Airsoft Gun
Black guns are cool, only they tin can give yous abroad in the natural environment which is very well-nigh, never black… That'south primarily the reason why so many modern military firearms are leaning towards FDE or tan anodised components. But earlier tan guns were a thing, the guys at the pointy stop of the spear sprayed their rifles.
Spraying guns is something that for a time was so prevalent that the stock price of krylon must take gone through the roof! Whilst theres a lot more than to good darkening than a painted rifle, it does assistance. Ill cover the fundamentals of cover-up at some point, only I'1000 certain that nearly of my readership will be more than than familiar with the bones practice's and practise non's of fieldcraft.
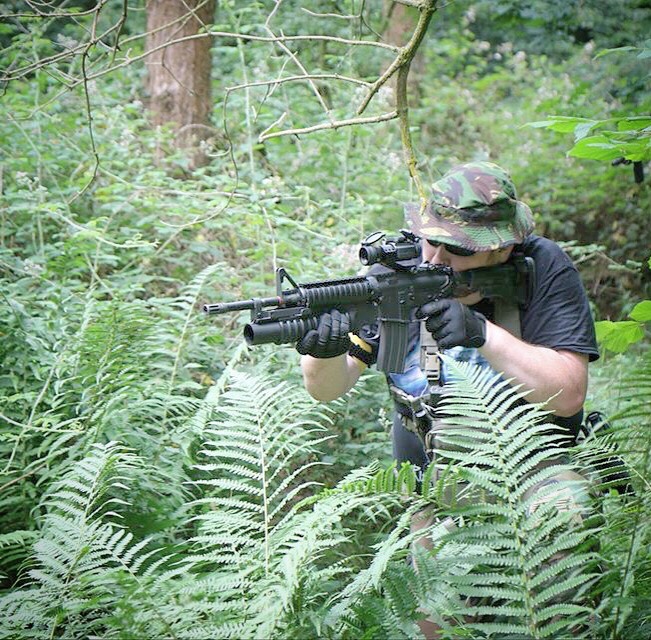
I've sprayed more a couple of Airsoft replicas, I've fifty-fifty sprayed a couple of firearms. Whilst at that place are many different ways to do it and many different furnishings you can achieve, this is how I spray mine for a U.K. woodland surround.

Preparation is key, without taking the time to set your replica, you chance doing a bad job or fifty-fifty damaging your replica. I'll run you through everything I'll exercise, pace by step to ensure you go a finish that'southward hopefully shut to what you're after.
And then what should you accept before you start spraying? Well, information technology'southward a flexible list simply at that place are some piffling $.25 I've found are perfect to give y'all the look yous're after.
- A well ventilated space, free of obstructions and well lit.
- A replica to paint
- Suitable spray paint
- Degreasing amanuensis
- Makeshift or purpose made stencils
- Blanking materials (more on this in a minute)
- Patience
So… lets pause this down.
A well ventilated space, costless of obstructions and well lit
Somewhere like a garage or shed is ideal, failing that you can e'er spray outdoors (spray inside the living areas of your house at your peril). I'd suggest that indoors is better because you'll want every bit close to no wind equally possible, you lot'll as well desire it to be relatively cool to ensure the paint doesn't go off too quickly (which can cause the paint to non cardinal to the detail properly. But if you accept no other choice, outside will piece of work as long as information technology's not likewise windy and the weather is skilful (simply not too skilful). If yous've got somewhere you tin hang your replica, I'd do it. I'll be demonstrating against a flat surface because its what most people will have access to, but if you lot desire to come across how a hung burglarize is sprayed, bank check out Ryan from Backcountry Workshop's spraying guide hither on The Reptile House Web log.

A replica to paint
Uncomplicated enough. make sure that your replica is clear and safe to handle, remove annihilation you don't want to go paint on and be prepared to exercise a fair amount of prep work before spraying.

Degreasing amanuensis
Something such as isopropyl alcohol on a micro fibre cloth, this will allow the surface to have the base layer without any issues.

Suitable spray paint
I personally apply Krylon, always take and e'er will. There are other options such as Halfords Camo paint and Tamiya or other model paints, but Krylon is the meliorate option and will requite you a flat Matt terminate with minimal runs and a colour that'll lucifer those reference pics we mostly apply as our guide. Krylon started the whole "putting paint into an aerosol can" thing and they're damn good at it.
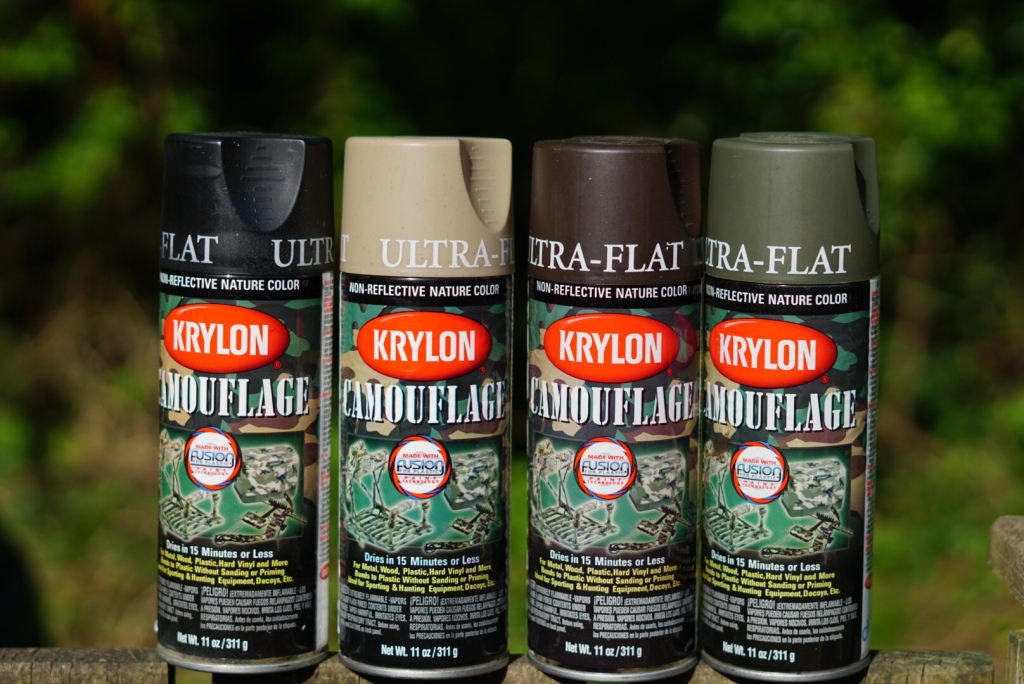
Tactical-Kit are the UKs biggest stockist of Krylon paints, they also carry the majority of the most used colours in stock. My four "go to" colours are Khaki, Olive, Brown and Black, this should profile yous with a good effectually design… Forest Green also works well for lush or tropical woodland areas.
Makeshift or purpose made stencils
This can be whatsoever yous've got to mitt… scrim netting, laundry handbag, natural foliage or purpose made card or stick on stencils for more complex patterns such every bit Kryptek or digital patterns. For this demo sick be using scrim netting and ferns, but use what's laying around in the area you play in… that'll give yous the most natural and effective finish.

Blanking materials
This is to block off whatsoever areas you need to keep free of paint, basically anything that will touch the performance of your replica should be shielded from paint. The master areas are usually… Muzzle, ejection port, magazine well, sights, optics and laser emitters. Materials from masking or electrical tape to Blue Tac are fantastic for blanking off delicate areas of your replica prior to painting.
Patience
Cocky explanatory really, the longer and slower you get, the better the end result. Spraying takes time, near fuck ups are acquired by impatience.
Preparing Your Replica
As mentioned, you lot'll want to degrease your replica and blank off whatsoever areas that you don't desire to get paint into. I'll generally tape off the entire magazine well to ensure no ingress of paint, although if you're painting your magazines as well, just seat 1 in identify and it should cover the gap more than adequately.

The cage, ejection port and anywhere else that could potentially allow pigment into the inner workings of your replica should be sealed upwards as all-time you can and don't forget the trigger! at that place's always a fair corporeality of space around the trigger than can crusade pigment to deep within to the gearbox or trigger unit of measurement.

I mostly remove the flash hider and tape up the threads, the muzzle would burn off or blacken the pigment anyhow so unless you lot're separating a suppressor to lucifer, I'd recommend doing the same.

Eyes can be blanked off with a layer of tape. I find electrical tape works better than masking tape for this as it prevents the paint creeping nether and onto lenses etc. Blue Tac is one of my favourites for blanking off though… squish information technology over the lens and yous'll never get paint where you don't want it. Just peel it off after to remove, and voila!
Detect a place you lot tin hang your replica if you lot've got the infinite, making certain you tin move around it. You tin can spray your replica on the footing, but you'll need to turn it over halfway to pigment the other side and it can effect in a less seamless paint job. however y'all've got your replica ready to paint, make sure that in that location's nada near information technology you don't want paint on. Equally mentioned, I'll be doing this on the ground but I'chiliad careful to follow the contours of the gun around the bottom and pinnacle to ensure I don't miss any patches.
Working out the pattern y'all want to create can be quite a challenge, with what I'd regard as my best paint job it was nearly recreating a specific prop used in the pic Lone Survivor and then i had to think very advisedly about every line I sprayed. Those of you who accept followed the web log for a while might be aware that I recreated one of the Mk12 Mod 1 SPRs used in the film, specifically the one used by Ben Foster (who played Matthew Axelson).

Degreasing the detail is vital, not only from mechanical grease but the oils that are deposited from merely holding it. I use isopropyl alcohol on a micro fibre, its a cracking cleaner for barrels airsoft as well.
One time I've got the replica prepped and gear up to spray, information technology's time to look at the base of operations coat. Generally I'll use a very low-cal dusting of Khaki or Olive green equally my base, the reason beingness that it's a lot harder to cover a dark pigment with a lite 1, and often the lighter colour paint volition give you lot a ameliorate starting bespeak to create your paint chore than with a darker base.

Following the instructions on the Krylon, be sure to shake the tins well before use and cheque the nozzles on a scrap of cardboard earlier spraying up your replica. Starting at one finish of your replica, get-go spraying a very low-cal coat across from one side to the other. Be sure to outset and end your spray beyond where your "sheet" is to ensure an even and drip-costless coat.
Keep the can around 10"/25cm away from the item you're painting, this might vary a little depending on the conditions but this is why we tested the cans first on a scrap of newspaper or card. Too shut and you'll finish up with thick patches of paint that'll end up pooling and dripping, too far and you'll terminate upwards with the paint "misting" in the air and forming pigment drops which can grade an inconsistent and patchy finish (although this is a technique I often apply as a final coat, more on this later).
In one case the first coat has been applied, be sure to leave information technology at least an hour to allow that kickoff layer before touching it again. It actually takes Krylon around 15 minutes to become "touch on dry" and vii days to properly fundamental into the item you're painting and become chip resistant. An hr is a good dominion of thumb and should forestall any light-headed fingerprints from appearing on your paintjob.

My 2d glaze is usually Olive (or khaki if my base coat was olive), this I'll first do with a scrim net over the item. More often than not I'll only spray half of the total surface area using the scrim then remove it to end upwardly the layer. This breaks up the shape of the scrim a little bit more, making for a more than natural stop.

Once I've finished with this coat, I'll expect at using darker pigment and the natural foliage. The darker colours should be used sparingly to get-go with, its easy to let them dominate and accept over, but this won't give you a balanced design. The foliage works best if you identify information technology "sunny side down" on your detail, the reason for this is that the leaves etc will naturally desire to jump abroad from the surface you lot lay them on, placing the leaves against the detail volition make for a much amend terminate.

Also exist aware that the really modest leaves, ferns and grass will desire to blow out the manner when you beginning spraying. Using the overlap spraying method will help, but you'll have to adjust your spraying height accordingly.

Later on I've finished this layer, I'll appraise the colour. If its as well light, I'll either add together more than dark stripes or give the whole replica a low-cal dusting of dark-brown/black. The same applies for the replica being too nighttime… I'll add a dusting of Khaki or Olive to bring the tone back where I want information technology.

There'south no real set rules with what works best, camouflage is equally much about breaking up outlines equally it is about the color. I've not sprayed up the accessories and optic because I tend to move them around, theres no doubting that the paint job would be more than effective if these were too sprayed, only I can always tape them upwards if needed.

The concluding office of your paint job is to make up one's mind how y'all want it to article of clothing, if you're happy plenty to wait, the paint will wear gradually until you lot're left with pretty much what i began this project with. If you want an instant in country wait, commencement messing around with it right abroad… wear some old gloves and get your hands all over it. You could be more extreme and brew it into the dirt and gravel… I've seen a very good friend do exactly that with a box fresh Marui 416, only more often than not a lilliputian crude playing over the first few days will get the paint wearing where you desire it to.

A final note, this is purely the mode I paint my ain replicas. I'm not the best at this past whatever means, but its fun to mess around and create something truly unique. There's never been a better time than now to exercise it, the majority of us accept more enough time on our hands.


How To Spray Paint Camo On Airsoft Gun,
Source: https://atrg.blog/2020/04/19/how-to-spray-your-gun/
Posted by: hadenwishave.blogspot.com
0 Response to "How To Spray Paint Camo On Airsoft Gun"
Post a Comment