

How To Paint A Dog Easy Step By Step
Charlotte likes pretty things, and she loves the beach, sushi, coffee and seashells.
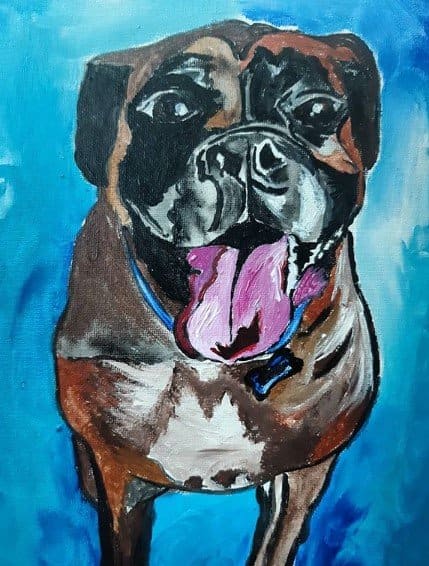
My personal artwork, fabricated using these instructions. A coworker's dog crossed Rainbow Span and I made this for her as a gift. She loved information technology.
A Guide to Painting Animal Portraits
Pet portraits are cute because they assistance to celebrate the life of the pet. Pet portraits tin help capture the joyous moments and expressions of today—or of a pet that has crossed Rainbow Bridge. Pet portraits are a special, unique and wonderful way to laurels the bond that only a pet owner, the family unit, and the pet can understand.
Painting a portrait can seem like a difficult or challenging task at first. It's important to consider that at that place are many styles of pet portrait, ranging from realistic to stylistic to even anime-style. Find what kind of style captures your heart, and what kind of style you are virtually comfortable with.
How to Pigment a Domestic dog (Beginner Pet Portrait Instructions)
- Gather your supplies (see list below).
- Choose a style.
- Paint the groundwork.
- Print a photo of the pet.
- Transfer the photo to your canvas.
- Add finishing touches.
Below, y'all'll find tips to guide you lot through each of these steps.
Step i: Gather Your Supplies
First, you need to get the supplies.
- Paints: You can accept a variety of paints; tips for acrylics and oils are included in this guide.
- Printer: You lot should also have access to a printer.
- Tracing Paper: You'll also need some carbon re-create tracing newspaper.
- Canvas: You lot should take an art canvass or some other kind of surface to paint upon. A recycled wooden plank would do.
- Gesso: It's best to treat the surface with gesso showtime, especially if using woods, a porous surface, or any kind of acrylic paint.
- Black Marker and Soft Fine art Pencils: You lot should have a good quality black marking and soft fine art pencils.
- Paintbrushes and Palette: Yous'll need to mix colors on a palette (equally opposed to but using the paint from the tube, which can end upwards being wasteful).
Step 2: Choose a Manner
Go on your last pet image in heed. Think:
- What colour is the pet?
- What personality does the pet have?
- Do you desire the paradigm to be more abstract, realistic, or a mixture of both?
Go along this mind when creating the background, as you want to consider highlights, shadows, and peradventure even tones that lucifer your domicile or favorite colors of the client who wants the pet portrait.
Step 3: Pigment the Background
After yous take gathered the supplies, you must decide on how you are going to paint the background. This step is like shooting fish in a barrel if you lot are using acrylic, as acrylic dries relatively fast.
If you are using oil paint, consider that oil sometimes takes weeks to dry. You lot can lessen the time to dry with oil paint if yous use drying mediums or linseed oil.
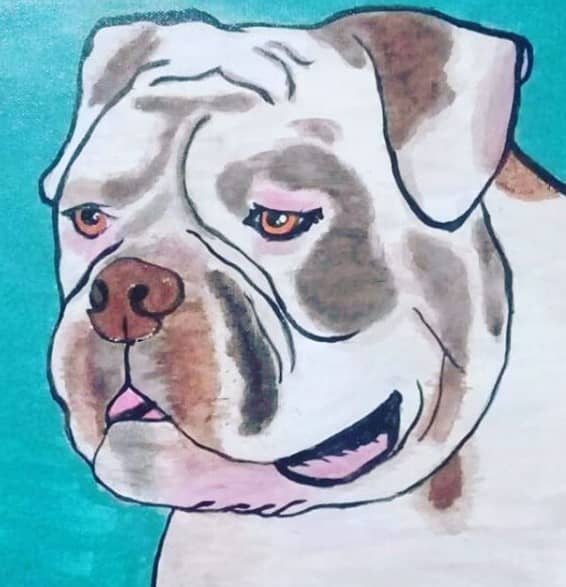
American Bulldog portrait: My cousin, who is 44 and has never painted in his life, followed my instructions and created this. It'south pretty great! You tin can practise it, too!
My cousin'due south art
Scroll to Continue
Read More From Feltmagnet
Stride 4: Print a Picture of the Pet
While the background dries, find the favorite photo of the pet. Print the photograph out in black and white.
Something that you might desire to do too is have the picture, on the editing software, flipped horizontally. Since nosotros'll be transferring the image onto the canvass with carbon paper, flipping the epitome now will ensure that the final image on the canvass is what the eyes see naturally (every bit opposed to the contrary epitome).
Why print in blackness and white?
The reason y'all want to print in blackness or white is and then that you can see the colour contrasts ameliorate, every bit well equally any highlights or shadows. This part of the process can be a bit time-consuming, only because you lot have to be careful that the picture doesn't impress likewise dark.
What if it prints too dark?
If it does, you'll accept to edit the pic on the estimator software, tablet, or phone until you tin see the iris of the pet. This is to foreclose losing many of the details. Sometimes with black and white prints, the darker areas might alloy together.
How big should the image be?
Make sure that when cropping the motion picture of the pet that the pet takes up nigh the unabridged folio. You can bank check this on the 'print preview' option before you print.
Step 5: Transfer the Picture on the Canvass
At this bespeak, you want to outline your photo and and so transfer it to the sail.
- Yous tin either carefully trace the epitome using the carbon copy paper straight on the dried canvas or trace the lines, shadows, and everything y'all want displayed in your picture on the printout itself.
- Make certain to use a soft graphite pencil. Pencils that are considered 'hard' won't transfer as easily, so proceed that in heed.
- Then, when you have finished, place the outline 'confront down' on the sail and use the cease of a paint brush or a hard surface to rub the dorsum page. This volition transfer the graphite on to the stale paint.
- You can use tape to secure the edges equally you transfer using this method, or transfer using the carbon copy paper method.
Step 6: Add Finishing Touches
At this betoken, y'all tin can use the marker to redraw the pencil to emphasize the lines, or you lot tin can utilize acrylic paint correct away if y'all want to use a less stylized approach.
- Add Color: Colour the lines, or color inside the lines. Be creative with color, or utilise the photograph reference you have for more than realistic colors.
- Let Information technology Dry: Add final touches to the dried painting, and over again, permit it dry out.
- Highlight the Eyes: You can add white highlights to the eyes, or create a unlike colour for the eyes to contrast the painting.
Additional Resources
- How to Draw a Semi-Realistic Dog: Step-by-Stride Tutorial
Learn how to draw a semi-realistic dog in this xi-step guide. - Dog Photography: How Aperture Can Better Your Pet Photos
Learn nearly aperture and how to change the depth of field to add a professional look to your dog photos. I've included a helpful cheat sail and examples yous can apply as you get started. - How to Paint Stones: Cat Portrait
Learn how to paint a rock cat, step-by-step, with detailed descriptions and over thirty photos.
© 2019 Charlotte Doyle
Janine Miranda from Manila on April 05, 2019:
Wow. That was an amazing article. Thanks for sharing those tips.
Liz Westwood from UK on April 04, 2019:
Y'all give some bully tips in this article. I recently saw a charcoal drawing of a friend's dog. It was very effective and much appreciated by the possessor.

How To Paint A Dog Easy Step By Step,
Source: https://feltmagnet.com/painting/How-do-You-Paint-Pet-Portraits
Posted by: hadenwishave.blogspot.com
0 Response to "How To Paint A Dog Easy Step By Step"
Post a Comment